Exporting Images in the DICOM Format
Whenever you export images in the DICOM format, you can choose the images to be exported and an export destination in the Export as DICOM Images dialog.
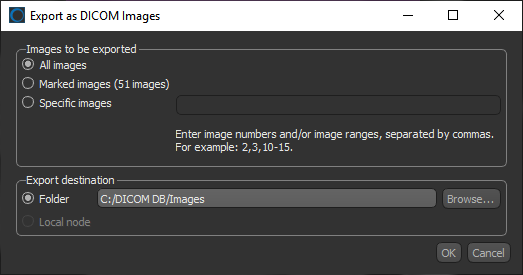
Right-click the data you want to export in the Data Properties and Settings panel and then choose Export > As DICOM in the pop-up menu to open the Export as DICOM Images dialog, shown below.
Export as DICOM Images dialog
DICOM (Digital Imaging and Communications in Medicine) is a standard for handling, storing, printing, and transmitting information in medical imaging. It includes a file format definition and a network communications protocol that uses TCP/IP to communicate between systems. DICOM files (*.dcm extension) can be exchanged between two entities that are capable of receiving images and data in DICOM format.
- Mark the image slices that you want in include in the exported series, optional (see Marking Image Slices).
- Right-click the data you want to export in the Data Properties and Settings panel and then choose Export > As DICOM in the pop-up menu.
The Export as DICOM Images dialog appears.
- Select the images to be exported — All images, Marked images, or Specific images.
If you selected Specific images, enter the image numbers or an image range, separated by commas. For example, 2,3,10-15.
- Select a destination folder, as follows:
- Enter the path to the destination folder.
- Click the Browse button and then choose a folder in the Select Output Folder dialog.
- Click OK to export the selected images.
- Click OK in the Export to DICOM message box.


